

Add and configure fields
Place every field each recipient must complete, with the right validation.
-
Select a recipient
Open Add Fields and select a recipient.
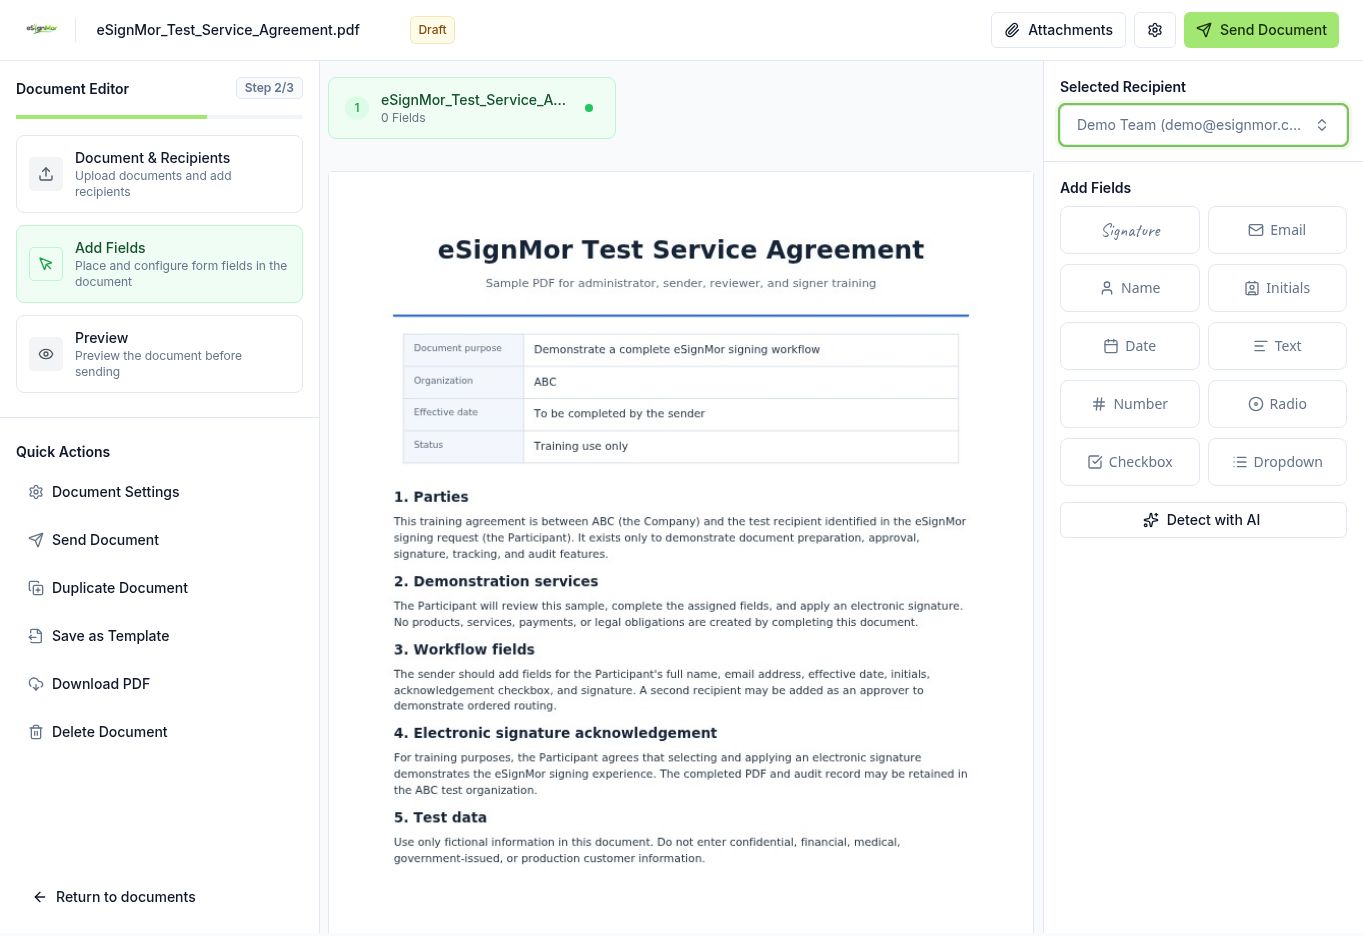 Select the recipient before placing fields.
 -
Place a signature field
Drag a Signature field to the correct PDF page.
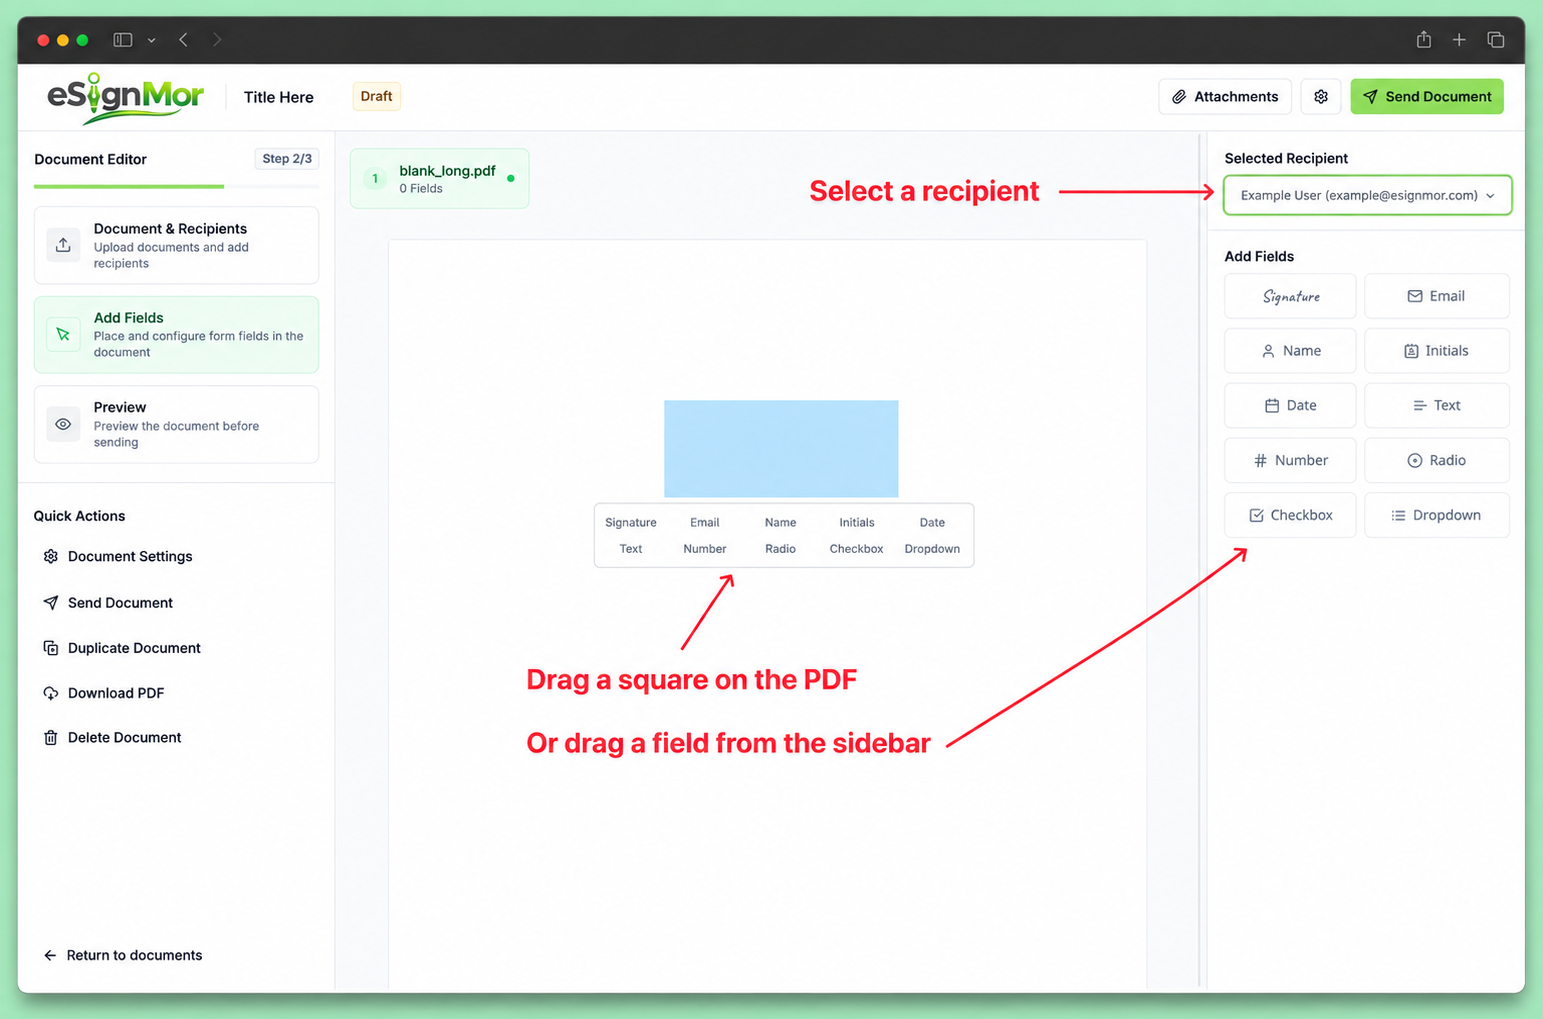 Assign a signature field to the signer.
 -
Add other field types
Add Initials, Name, Email, Date, Text, Number, Checkbox, Radio, or Dropdown fields where required.
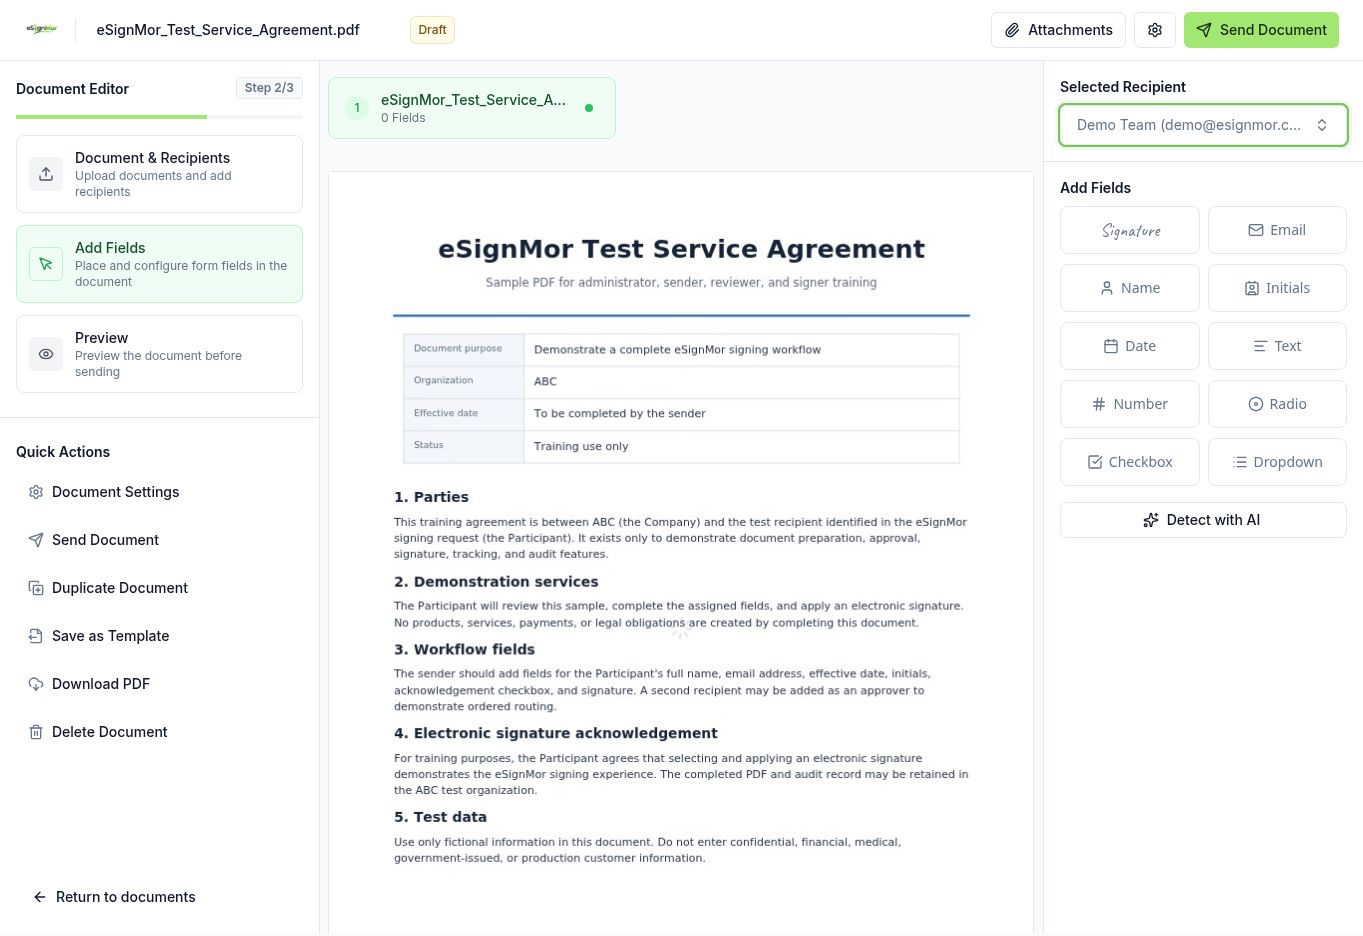 Choose the correct field for each response.
 -
Align the layout
Resize and align fields without covering document content.
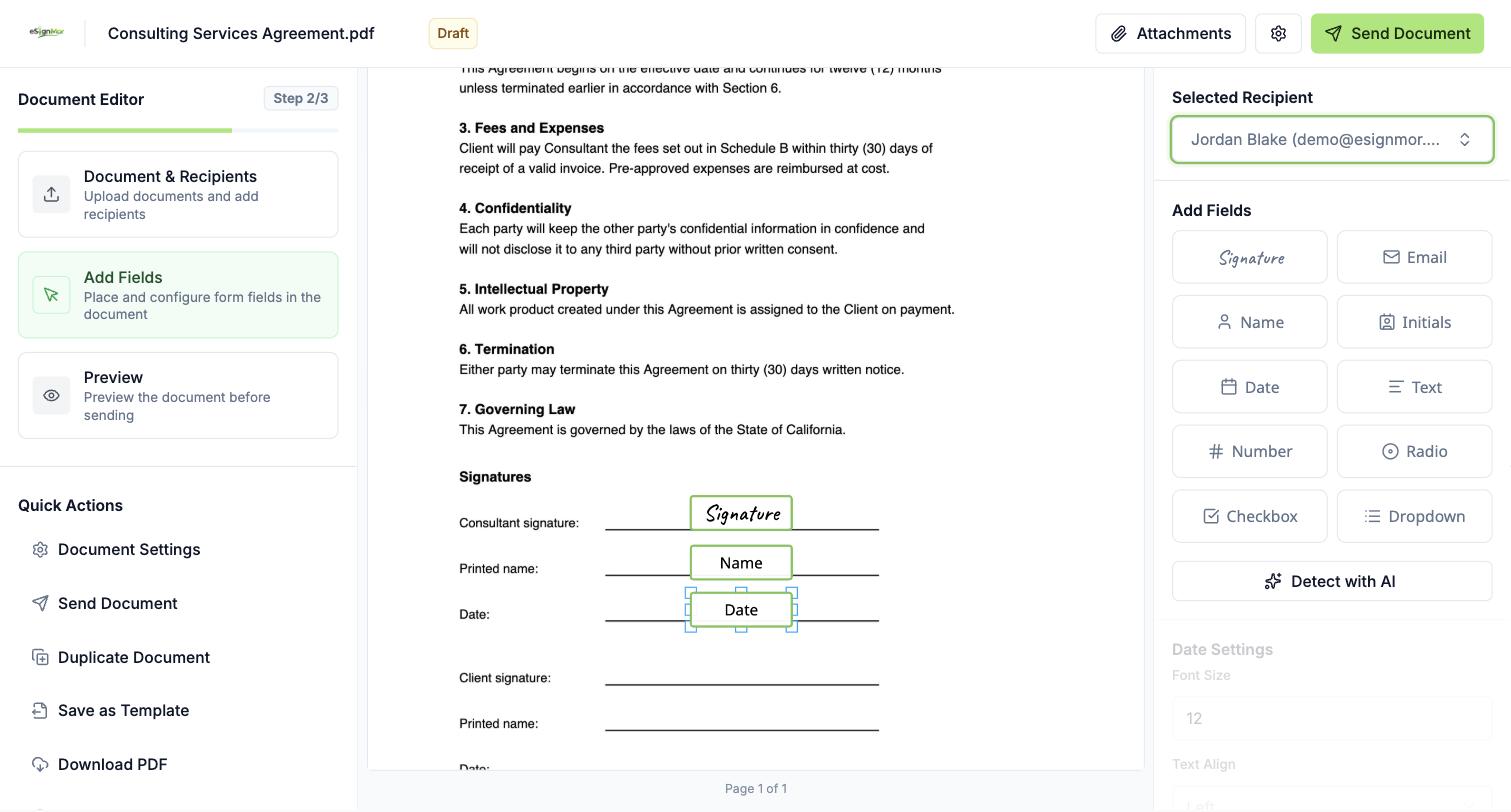 Position fields clearly and consistently.
 -
Configure properties
Configure label, placeholder, font size, validation, required, and read-only behavior.
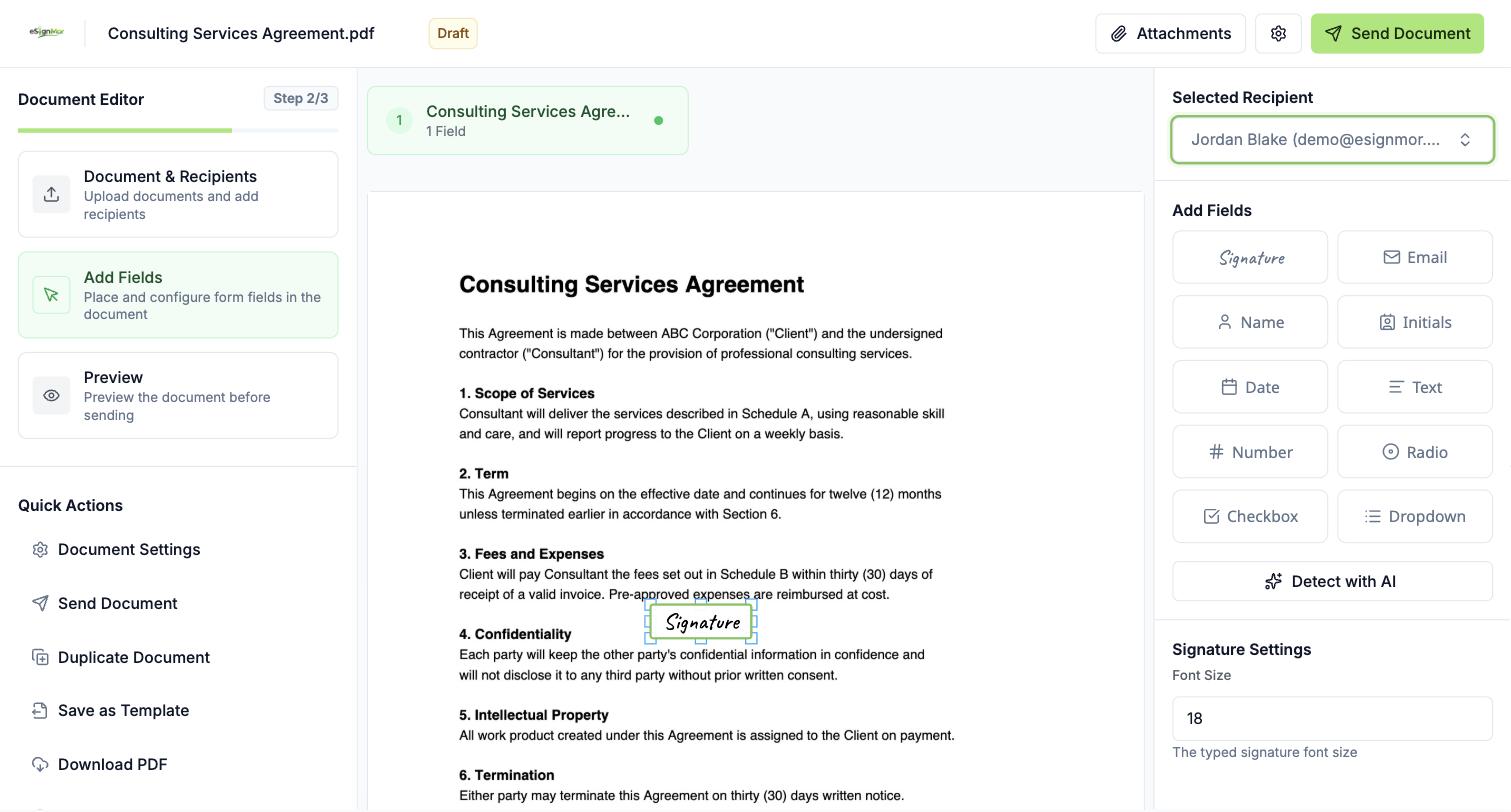 Configure validation and required behavior.
 -
Repeat for everyone
Repeat for every actionable recipient and page.
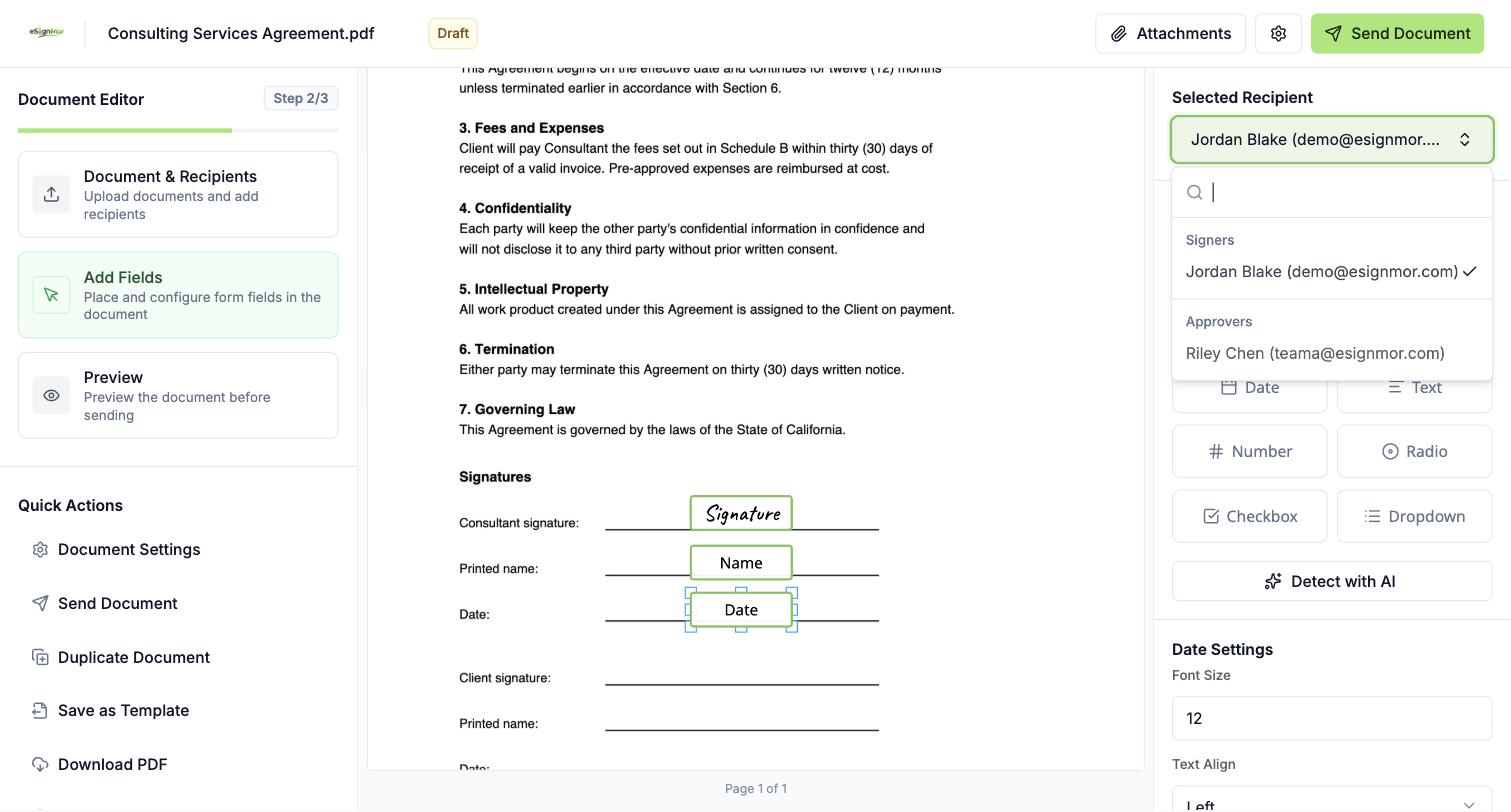 Complete field assignment for every recipient.
Important: A signer with no field cannot complete the document.
-
Preview the result
Use Preview and verify every page.
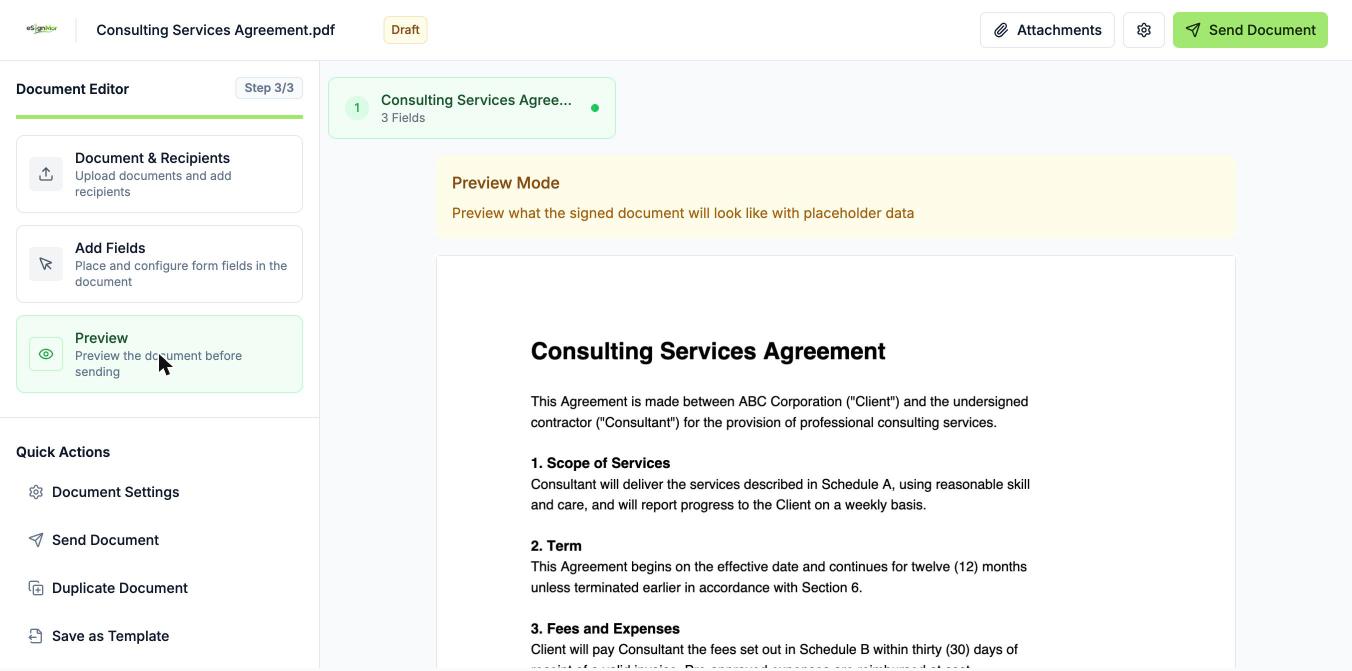 Preview the complete recipient experience.
Result: Each recipient sees only their own fields.
Need a hand? Email support@esignmor.com.